Chevrolet Trax: Brake pressure modulator valve bracket replacement
Chevrolet Trax (2013-2022) Workshop Manual / Brakes / Antilock Brake System / Repair instructions / Brake pressure modulator valve bracket replacement
Removal Procedure
- Remove the brake pressure modulator valve (BPMV) and bracket assembly. Refer to Brake Pressure Modulator Valve Replacement.
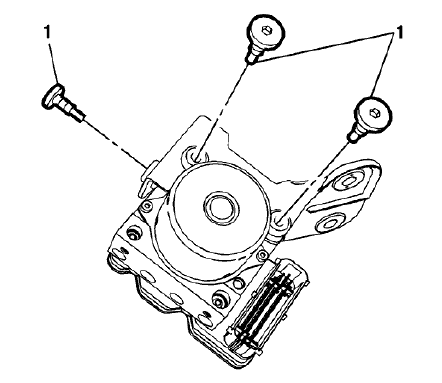
Fig. 24: Brake Pressure Modulator Valve Bolts
- Remove the BPMV bolts (1).
- Remove the BPMV bracket.
Installation Procedure
- Install the BPMV bracket to the BPMV.
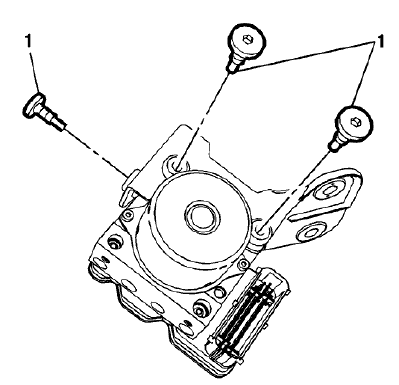
Fig. 25: Brake Pressure Modulator Valve Bolts
CAUTION: Refer to Fastener Caution .
- Install the BPMV bolts (1) and tighten to 11 N.m (97 lb in).
- Install the BPMV and bracket assembly. Refer to Brake Pressure Modulator Valve Replacement.
FRONT WHEEL SPEED SENSOR REPLACEMENT
Removal Procedure
WARNING: Refer to Brake Dust Warning .
- Raise and support the vehicle. Refer to Lifting and Jacking the Vehicle .
- Remove the tire and wheel assembly. Refer to Tire and Wheel Removal and Installation .
- Clean the wheel speed sensor mounting area on the steering knuckle of any accumulated dirt and debris.
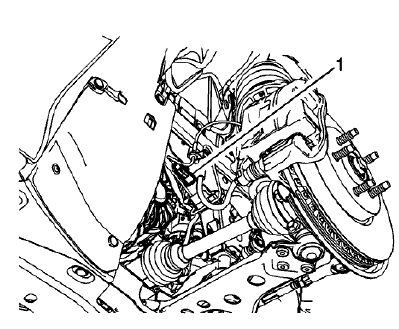
Fig. 26: Wheel Speed Sensor Electrical Connector
- Disconnect the wheel speed sensor electrical connector (1) and release the connector from the vehicle body.
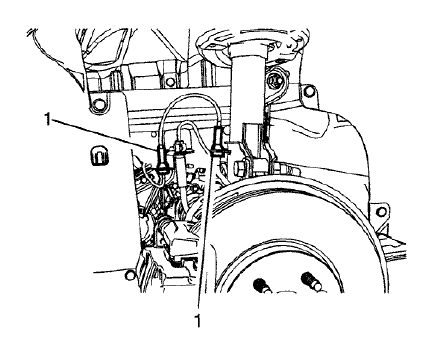
Fig. 27: Wheel Speed Sensor Harness Grommets
- Release the wheel speed sensor harness grommets (1) from the brake hose brackets.
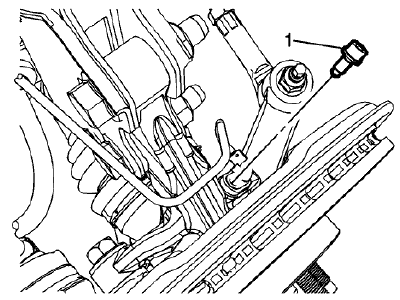
Fig. 28: Wheel Speed Sensor Bolt
- Remove the wheel speed sensor bolt (1).
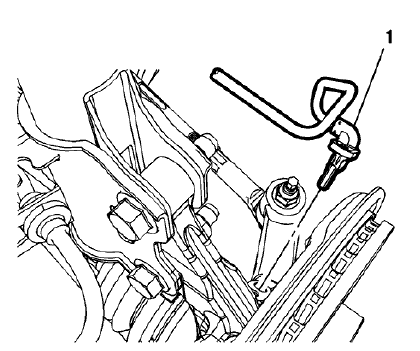
Fig. 29: Wheel Speed Sensor
- Carefully remove the wheel speed sensor (1) from the steering knuckle by pulling the sensor straight upward using a slight twisting motion.
Installation Procedure
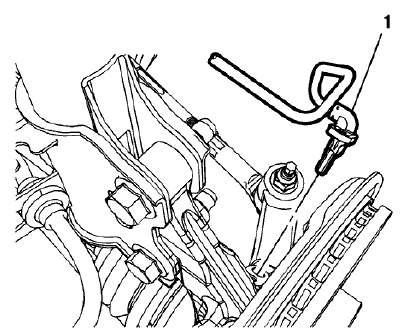
Fig. 30: Wheel Speed Sensor
- Install the wheel speed sensor (1) to the steering knuckle.
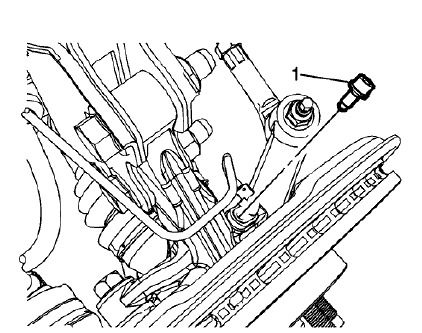
Fig. 31: Wheel Speed Sensor Bolt
CAUTION: Refer to Fastener Caution .
- Install the wheel speed sensor bolt (1) and tighten to 8 N.m (71 lb in).
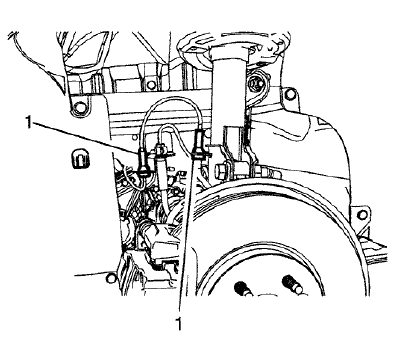
Fig. 32: Wheel Speed Sensor Harness Grommets
- Install the wheel speed sensor harness grommets (1) to the brake hose brackets.
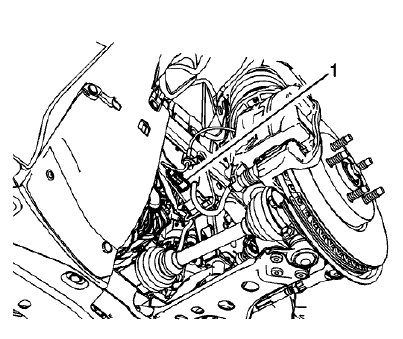
Fig. 33: Wheel Speed Sensor Electrical Connector
- Connect the wheel speed sensor electrical connector (1) and install the connector to the vehicle body.
- Install the tire and wheel assembly. Refer to Tire and Wheel Removal and Installation .
- Perform the diagnostic system check. Refer to Diagnostic System Check - Vehicle .
READ NEXT:
 Rear wheel speed sensor replacement
Removal Procedure
WARNING: Refer to Brake Dust Warning .
Raise and support the vehicle. Refer to Lifting and Jacking the Vehicle
.
Remove the tire and wheel assembly. Refer to Tire and Wheel Remo
Vehicle stability control system switch replacement
Fig. 42: Vehicle Stability Control System Switch
Vehicle Stability Control System Switch Replacement
VEHICLE YAW SENSOR LEARN
The yaw rate sensor learn procedure can be completed with a scan tool
Description and operation
ABS DESCRIPTION AND OPERATION
Antilock Brake System Block Diagram
Fig. 45: Antilock Brake System Block Diagram
This vehicle is equipped with the MGH 60 Mando electronic stability control
brake
SEE MORE:
Rear differential clutch control module programming and setup
Special Tools
EL-49642 SPS Programming Support Tool
For equivalent regional tools, refer to Special Tools.
NOTE:
DO NOT program a control module unless directed to by a service
procedure or a service bulletin. If the ECU is not properly configured with
the correct calibration software, the ECU w
Transfer case cleaning and inspection
Transfer Case Housing Cleaning and Inspection
Fig. 53: Transfer Case Housing Cleaning And Inspection Points
Transfer Case Cleaning and Inspection
Transfer Case Rear Extension Housing Cleaning and Inspection
Fig. 54: Transfer Case Rear Extension Housing Cleaning And Inspection Areas
Transfer
© 2019-2026 Copyright www.chevtrax.com
