
Chevrolet Trax: Instrument panel upper trim panel bracket replacement (UAG)
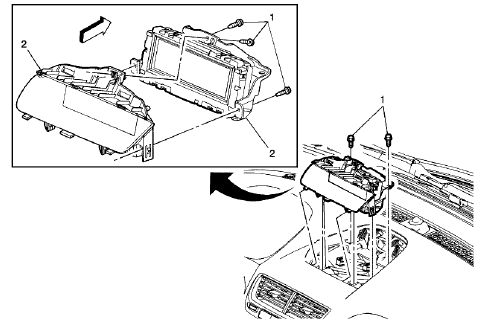
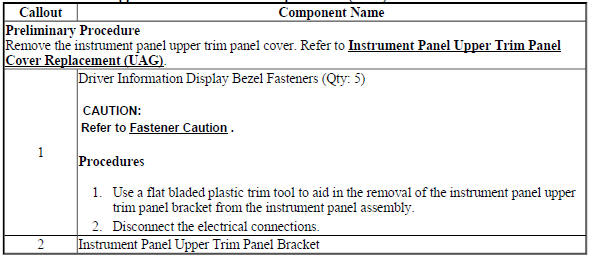
Fig. 22: Instrument Panel Upper Trim Panel Bracket
Instrument Panel Upper Trim Panel Bracket Replacement (UAG)
INSTRUMENT PANEL UPPER TRIM PANEL BRACKET REPLACEMENT (UDN)
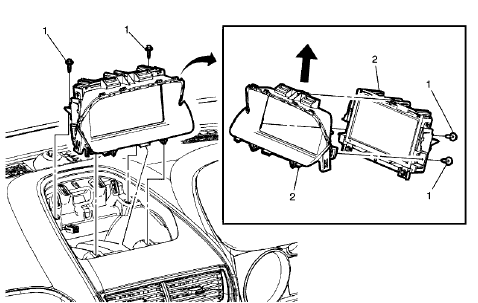
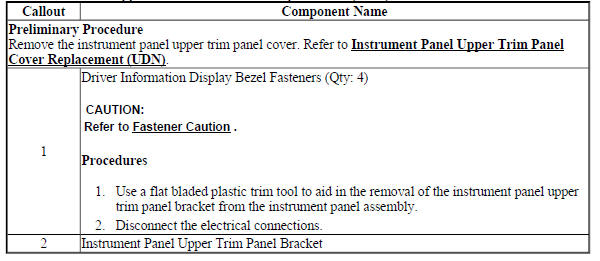
Fig. 23: Instrument Panel Upper Trim Panel Bracket
Instrument Panel Upper Trim Panel Bracket Replacement (UDN)
INSTRUMENT PANEL OUTER TRIM COVER REPLACEMENT (TRAX)
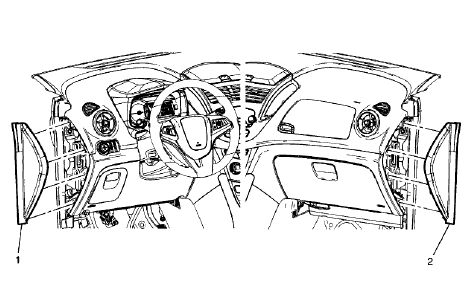
Fig. 24: Instrument Panel Outer Trim Covers
Instrument Panel Outer Trim Cover Replacement (Trax)
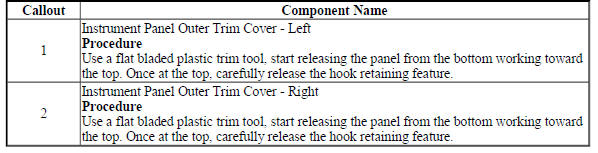
INSTRUMENT PANEL OUTER TRIM COVER REPLACEMENT (ENCORE)
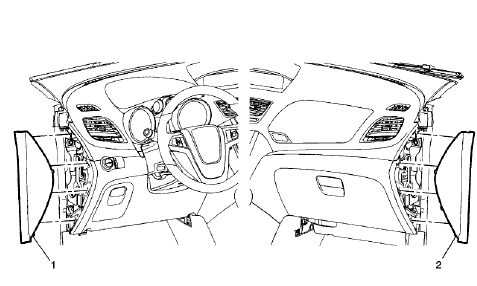
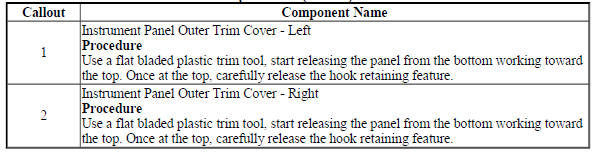
Fig. 25: Instrument Panel Outer Trim Cover
Instrument Panel Outer Trim Cover Replacement (Encore)
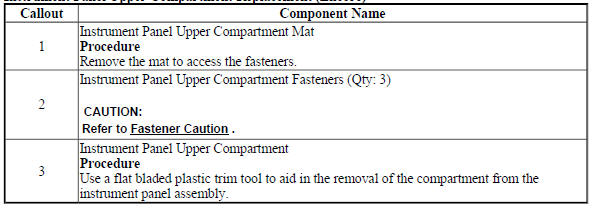
INSTRUMENT PANEL UPPER COMPARTMENT REPLACEMENT (ENCORE)
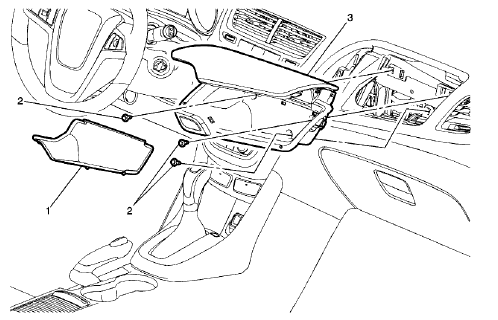
Fig. 26: Instrument Panel Upper Compartment
Instrument Panel Upper Compartment Replacement (Encore)
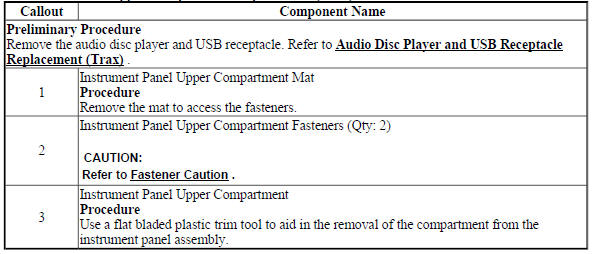
INSTRUMENT PANEL UPPER COMPARTMENT REPLACEMENT (TRAX)
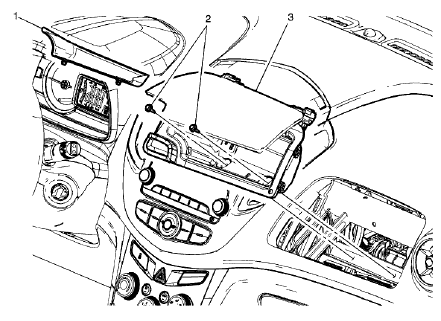
Fig. 27: Instrument Panel Upper Compartment
Instrument Panel Upper Compartment Replacement (Trax)
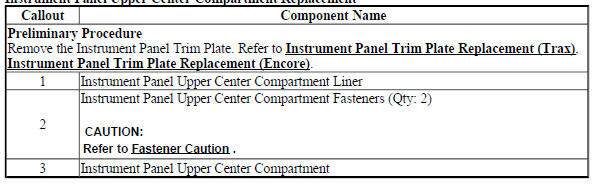
INSTRUMENT PANEL UPPER CENTER COMPARTMENT REPLACEMENT
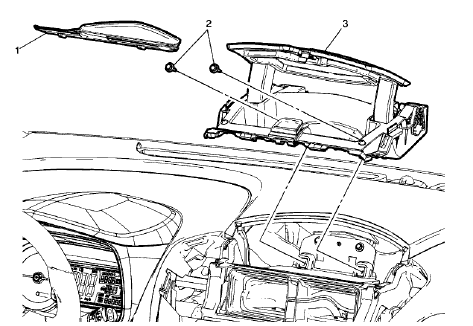
Fig. 28: Instrument Panel Upper Center Compartment
Instrument Panel Upper Center Compartment Replacement
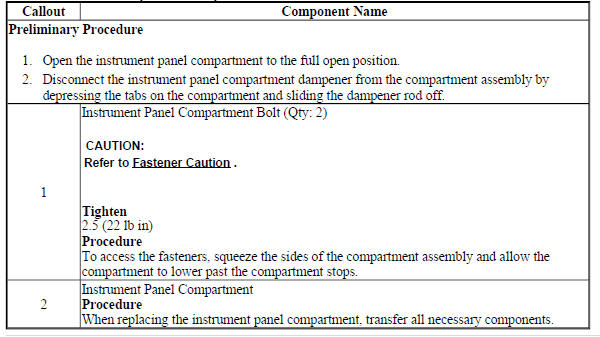
INSTRUMENT PANEL COMPARTMENT REPLACEMENT
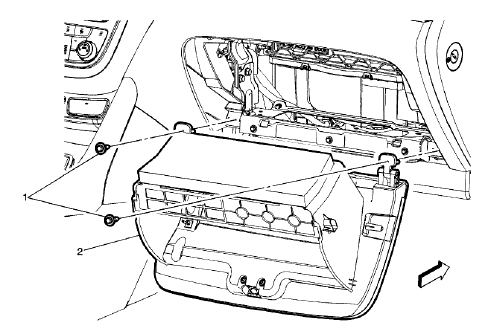
Fig. 29: Instrument Panel Compartment
Instrument Panel Compartment Replacement
READ NEXT:
 Instrument panel assembly replacement (trax)
Removal Procedure
Disable the SIR system. Refer to SIR Disabling and Enabling .
Fig. 30: Windshield Garnish Molding Assembly
Remove both of the windshield garnish moldings (1). Refer to Windshi
Instrument panel assembly replacement (encore)
Removal Procedure
Disable the SIR system. Refer to SIR Disabling and Enabling .
Fig. 64: Windshield Garnish Molding Assembly
Remove both of the windshield garnish moldings (1). Refer to Windshi
Instrument panel retainer replacement - left side (encore)
Removal Procedure
Remove the left instrument panel outer air outlet. Refer to Instrument
Panel Outer Air Outlet
Replacement (Trax) , Instrument Panel Outer Air Outlet Replacement (Encore)
.
Re
SEE MORE:
Schematic wiring diagrams
SPECIFICATIONS
FASTENER TIGHTENING SPECIFICATIONS
Fastener Tightening Specifications
SCHEMATIC WIRING DIAGRAMS
MOVEABLE WINDOW WIRING SCHEMATICS (ENCORE)
Front Windows
Fig. 1: Front Windows
Rear Windows
Fig. 2: Rear Windows
MOVEABLE WINDOW WIRING SCHEMATICS (TRAX)
Front and Rear Power Windows
Power brake booster vacuum hose replacement
Removal Procedure
With the engine OFF, apply and release the brake pedal several times to
deplete the power vacuum brake
booster vacuum reserve.
Raise and support the vehicle. Refer to Lifting and Jacking the Vehicle
.
Fig. 173: Power Brake Booster Vacuum Hose Quick Connect
Through the
