
Chevrolet Trax: Interior Trim and Paneling - Repair instructions
Chevrolet Trax (2013-2022) Workshop Manual / Accessories & Equipment / Interior Trim and Paneling / Interior Trim and Paneling - Repair instructions
SPECIFICATIONS
FASTENER TIGHTENING SPECIFICATIONS
Fastener Tightening Specifications

REPAIR INSTRUCTIONS
REAR SIDE DOOR ACCESSORY SWITCH MOUNT PLATE REPLACEMENT (ENCORE)
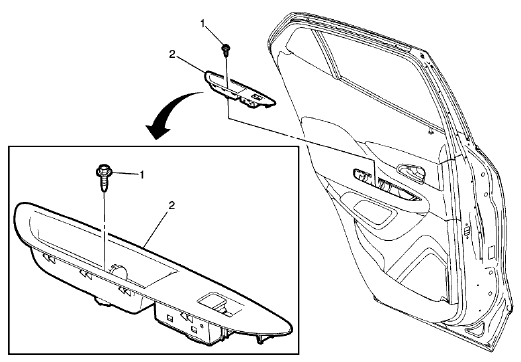
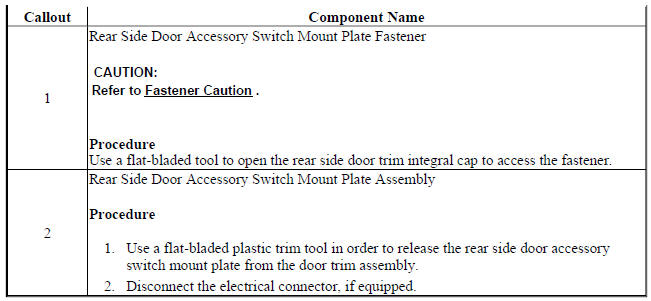
Fig. 1: Rear Side Door Accessory Switch Mount Plate
Rear Side Door Accessory Switch Mount Plate Replacement (Encore)
REAR SIDE DOOR ACCESSORY SWITCH MOUNT PLATE REPLACEMENT (TRAX)
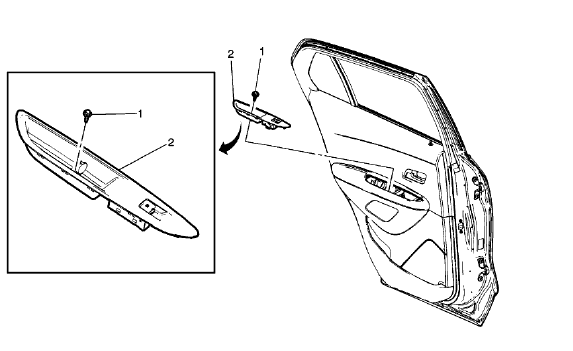
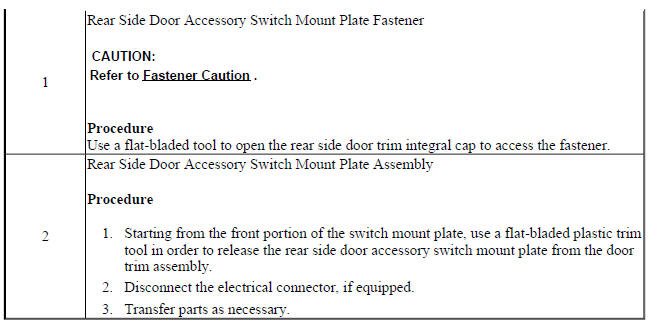
Fig. 2: Rear Side Door Accessory Switch Mount Plate
Rear Side Door Accessory Switch Mount Plate Replacement (Trax)

- Front side door armrest switch mount plate replacement (driver side door, encore)
- Rear side door window garnish molding replacement (encore)
- Roof rail front stowage compartment replacement (encore)
READ NEXT:
 Front side door armrest switch mount plate replacement (driver side door,
encore)
Front side door armrest switch mount plate replacement (driver side door,
encore)
Fig. 3: Front Side Door Armrest Switch Mount Plate - Driver Side Door
Front Side Door Armrest Switch Mount Plate Replacement (Driver Side Door,
Encore)
FRONT SIDE DOOR ARMREST SWITCH MOUNT PLATE
Rear side door window garnish molding replacement (encore)
Fig. 9: Rear Side Door Window Garnish Molding
Rear Side Door Window Garnish Molding Replacement (Encore)
REAR SIDE DOOR WINDOW GARNISH MOLDING REPLACEMENT (TRAX)
Fig. 10: Rear Side Door Window G
Roof rail front stowage compartment replacement (encore)
Fig. 12: Roof Rail Front Stowage Compartment
Roof Rail Front Stowage Compartment Replacement (Encore)
ROOF RAIL FRONT STOWAGE COMPARTMENT REPLACEMENT (TRAX)
Fig. 13: Roof Rail Front Stowage Comp
SEE MORE:
Power brake booster vacuum hose replacement
Removal Procedure
With the engine OFF, apply and release the brake pedal several times to
deplete the power vacuum brake
booster vacuum reserve.
Raise and support the vehicle. Refer to Lifting and Jacking the Vehicle
.
Fig. 173: Power Brake Booster Vacuum Hose Quick Connect
Through the
Power mirror tilt inoperative in reverse
Diagnostic Instructions
Perform the Diagnostic System Check - Vehicle prior to using this
diagnostic procedure.
Review Strategy Based Diagnosis for an overview of the diagnostic
approach.
Diagnostic Procedure Instructions provides an overview of each
diagnostic category.
Circuit/System De
© 2019-2026 Copyright www.chevtrax.com
